


 AI智能应用开发
 AI大模型开发(Python)
 AI鸿蒙开发
 AI嵌入式+机器人开发
 AI运维
AI运维 AI测试
AI测试 跨境电商运营
 AI设计
AI设计 AI视频创作与直播运营
 微短剧拍摄剪辑
 C/C++
C/C++ 狂野架构师
狂野架构师


Android培训实战教程之屏幕适配
更新时间:2015年12月28日13时38分 来源:传智播客Android培训学院 浏览次数:
什么是适配
适配 即当前应用在相同的手机上面显示相同的效果。适配前需要首先确定当前手机所属像素密度类型(如:xhdpi、hdpi、mdpi等),下面以华为G700、模拟器为例,讲解如何计算像素密度。
案例一:
手机型号:G700
手机分辨率:1280*720 (注:手机两个直角边上分别放置了1280及720个像素点)
手机尺寸大小:5英寸(手机斜边长度)
假设a,b分别为两个直角边,c为斜边,由勾股定理可得出计算方式:sqrt(a*a+b*b)/c
计算结果:sqrt(1280*1280+720*720)/5 ≈ 293.72dpi
根据google官方文档说明得出,当前手机最接近320dpi,则将其归纳在xhdpi手机范围内,
即1dp=2px;
案例二:
手机型号:模拟器
手机分辨率:800*480(注:手机两个直角边上分别放置了800及480个像素点)
手机尺寸大小:3.7英寸(手机斜边大小)
计算结果:sqrt(800*800+480*480)/3.7 ≈ 252.15dpi
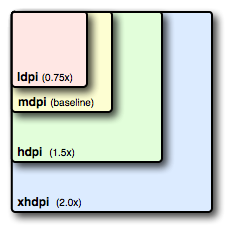
根据google官方文档(图1-1)得出,当前手机接近240dpi,则将其归纳在hdpi手机范围内,
即1dp=1.5px。
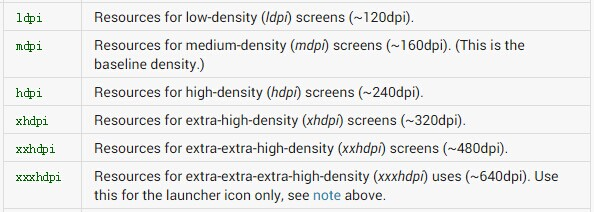
按照以上计算方式,大致可以将市场上的手机划分为5个像素密度等级,具体如下:
- ldpi:120dpi,像素密度与dp转换关系为:1dp = 0.75px
- mdpi:160dpi ,像素密度与dp转换关系为:1dp = 1px
- hdpi:240dpi,像素密度与dp转换关系为:1dp = 1.5px
- xhdpi:320dpi,像素密度与dp转换关系为:1dp = 2px
- xxhdpi:480dpi,像素密度与dp转换关系为:1dp = 3px
如何适配
下面以华为手机G700和模拟器的对比,讲解如何进行屏幕适配,具体方式如下:适配方式1:图片适配
不同像素密度的手机加载工程资源文件(res)中不同资源图片,以手机G700和模拟器为例,图片的布局代码如下所示:<RelativeLayout
xmlns:android="http://schemas.android.com/apk/res/android"
xmlns:tools="http://schemas.android.com/tools"
android:layout_width="match_parent"
android:layout_height="match_parent"
tools:context=".MainActivity" >
<ImageView
android:layout_width="wrap_content"
android:layout_height="wrap_content"
android:background="@drawable/a"/>
</RelativeLayout>
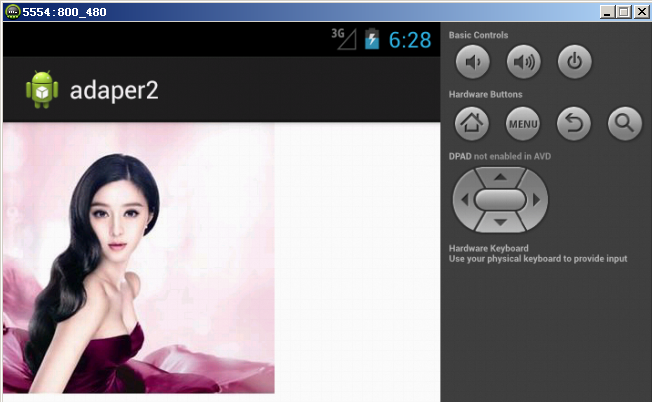
若使用G700(xhdpi)加载a.jpg文件,该文件位于res/drawable-xhdpi文件夹下,显示效果如下:
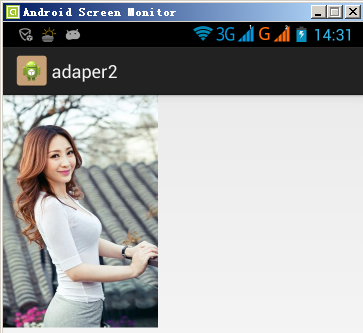
若使用模拟器(hdpi)加载a.jpg文件,该文件位于res/drawable-hdpi文件夹下,显示效果如下:
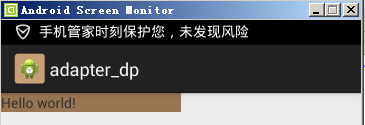
适配方式2:dimens.xml文件适配
dimens.xml存在于工程资源(res)文件夹中不同values(如:value-1280x720、value-800x480)文件夹下,可用于指定控件大小,不同像素密度手机加载不同values文件夹下的dimens.xml文件,使用方式如下:<LinearLayout xmlns:android="http://schemas.android.com/apk/res/android"
xmlns:tools="http://schemas.android.com/tools"
android:layout_width="match_parent"
android:layout_height="match_parent"
android:orientation="vertical"
tools:context=".MainActivity" >
<!-- 不同的手机加载不同的dp -->
<TextView
android:background="#987654"
android:layout_width="@dimen/width"
android:layout_height="wrap_content"
android:text="@string/hello_world" />
</LinearLayout>
模拟器(hdpi):加载dimens.xml资源文件,位于res/value-800x480文件夹下
<resources>
<dimen name="width">160dp</dimen>
</resources>
根据上述hdpi dp和px的转换关系1dp = 1.5px,则160dp = 240px,当前控件宽度应该位于屏幕中间位置。
G700(xhdpi):加载dimens.xml资源文件,位于res/value-1280x720文件夹下
<resources>
<dimen name="width">180dp</dimen>
</resources>
根据上述xhdpi 中dp和px的转换关系1dp = 2px,则180dp = 360px,当前控件宽度应该位于屏幕中间位置。
G700(xhdpi)显示的图片效果如下所示:

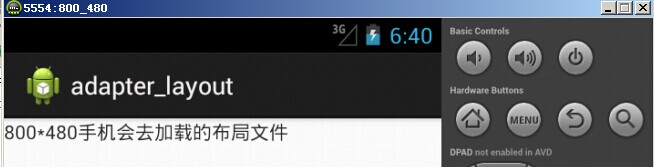
适配方式3:布局文件适配
不同分辨率的手机,加载不同的布局文件已达到适配效果。创建多个layout(如:layout-1280x720、layout-800x480)文件夹用于存放不同像素密度手机所需布局文件。模拟器(hdpi):加载activity_main.xml布局文件,位于res/layout-800x480文件夹下:
<RelativeLayout
xmlns:android="http://schemas.android.com/apk/res/android"
xmlns:tools="http://schemas.android.com/tools"
android:layout_width="match_parent"
android:layout_height="match_parent"
tools:context=".MainActivity" >
<TextView
android:layout_width="wrap_content"
android:layout_height="wrap_content"
android:text="800*480手机会去加载的布局文件" />
</RelativeLayout>
G700(xhdpi):加载activity_main.xml布局文件,位于res/layout-1280x720文件夹下:
<RelativeLayout
xmlns:android="http://schemas.android.com/apk/res/android"
xmlns:tools="http://schemas.android.com/tools"
android:layout_width="match_parent"
android:layout_height="match_parent"
tools:context=".MainActivity" >
<TextView
android:layout_width="wrap_content"
android:layout_height="wrap_content"
android:text="1280*720手机会去加载的布局文件" />
</RelativeLayout>
G700(xhdpi)显示的图片效果如下:

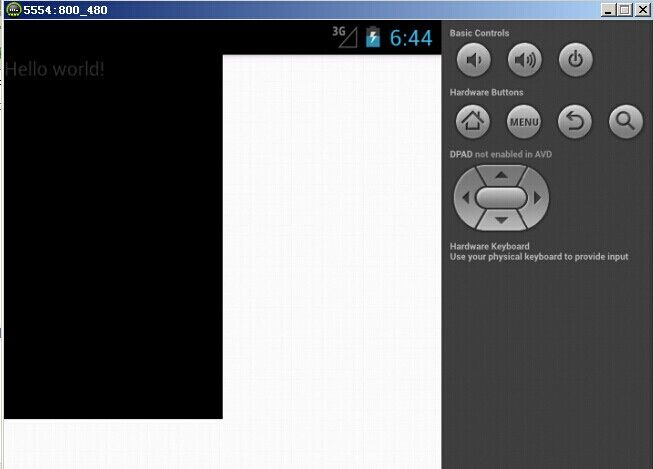
适配方式4:java代码适配
通过android相应api获取当前手机的宽高像素值,按比例分配屏幕中控件的宽高以达到适配效果,下面是布局和实现功能的核心代码:布局文件
<RelativeLayout
xmlns:android="http://schemas.android.com/apk/res/android"
xmlns:tools="http://schemas.android.com/tools"
android:layout_width="match_parent"
android:layout_height="match_parent"
tools:context=".MainActivity" >
<TextView
android:id="@+id/tv"
android:background="#000000"
android:layout_width="wrap_content"
android:layout_height="wrap_content"
android:text="@string/hello_world" />
</RelativeLayout>
activity中oncreate核心代码:
TextView tv = (TextView) findViewById(R.id.tv);
//获取封装当前手机屏幕信息对象,用于存放宽高值
DisplayMetrics metrics = new DisplayMetrics();
//给当前屏幕设置宽高
getWindowManager().getDefaultDisplay().getMetrics(metrics);
//获取高度
Constant.srceenHeight = metrics.heightPixels;
//获取宽度
Constant.srceenWidth = metrics.widthPixels;
Log.i(tag, "Constant.srceenHeight = "+Constant.srceenHeight);
Log.i(tag, "Constant.srceenWidth = "+Constant.srceenWidth);
//宽高各占50%
RelativeLayout.LayoutParams layoutParams = new
RelativeLayout.LayoutParams(
(int)(Constant.srceenWidth*0.5+0.5),
(int)(Constant.srceenHeight*0.5+0.5));
tv.setLayoutParams(layoutParams);
G700(xhdpi)显示效果如下:
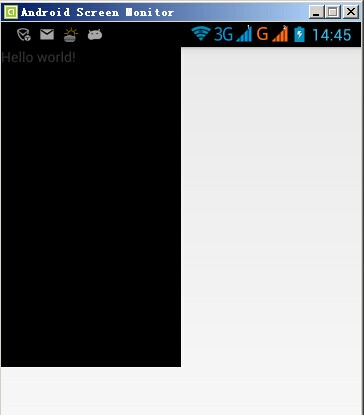
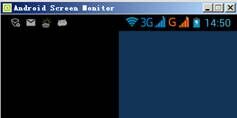
适配方式5:权重适配
通过android提供的(权重)剩余空间分配,达到适配效果。布局文件如下所示:<LinearLayout xmlns:android="http://schemas.android.com/apk/res/android"
xmlns:tools="http://schemas.android.com/tools"
android:layout_width="match_parent"
android:layout_height="match_parent"
android:orientation="horizontal"
tools:context=".MainActivity" >
<TextView
android:background="#000000"
android:layout_width="0dp"
android:layout_weight="1"
android:layout_height="match_parent"/>
<TextView
android:background="#123456"
android:layout_width="0dp"
android:layout_weight="1"
android:layout_height="match_parent"/>
</LinearLayout>
G700(xhdpi)显示的图片效果如下所示:

本文版权归传智播客Android培训学院所有,欢迎转载,转载请注明作者出处。谢谢!
作者:传智播客Android培训学院
首发:http://www.itcast.cn/android/
最新资讯
相关阅读
0
分享到:


江苏传智播客教育科技股份有限公司 版权所有Copyright 2006-2024 All
Rights Reserved
苏ICP备16007882号营业执照增值电信业务经营许可证出版物经营许可证 苏公网安备 32132202001156号
免费领取黑马程序员AI通道专属星级课程资料
